Want to set up RSS Tracking system for your blog?
Tracking RSS subscribers on your new blog is very important to grow your blog and get more traffic to your blog.
It shows you how to progress with your blog in the future.
And of my favorite is Feedburner.
This article will guide you to set up feedburner with the best settings configured.
Why should you use RSS Tracking System like Feedburner?
1. Tracking RSS subscribers will help you gain insights into the clickthroughs you get, track usage patterns of your readers.
2. You actually get another option for monetization through RSS.
3. Some RSS subscription services include email subscription which you can use to gain more subscribers to your blog.
4. Some RSS readers help distribute to other content publishing networks when you publish more content.
So, I have chosen Feedburner.
Here’s How to Set Up Feedburner the Right Way
You can choose from many but without a second thought – I would choose Feedburner.
Now, I won’t brag about why I like Feedburner, but jump straight into how to setup feedburner. In fact, I’ll walk you through my actual settings at PastMasterBlogger and go through all details.
Ready?
Let’s get started!
Signing Up
Let’s actually start from sign up.
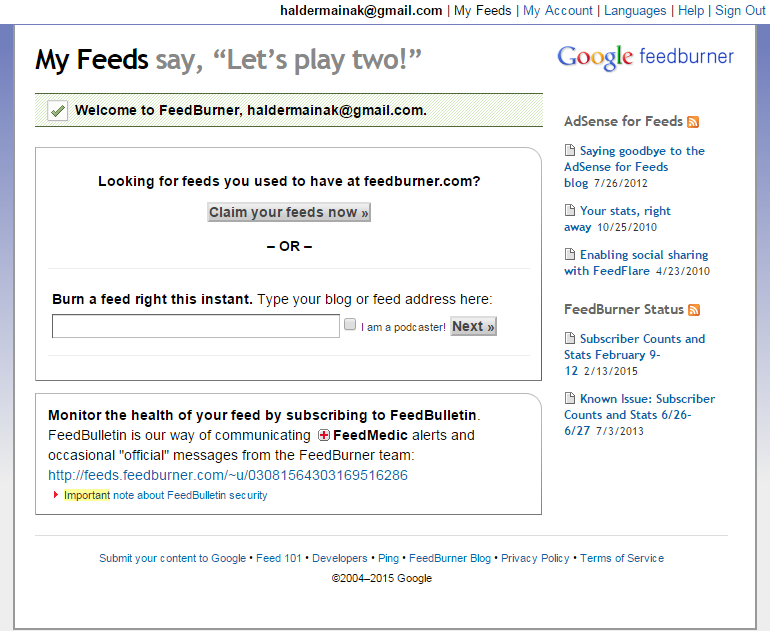
Head over to the homepage of Feedburner and sign up (if you don’t yet have a Google account yet) or sign in (if you already have an existing Google account) using the username and password.
Claiming Your Feed
The first thing you have to do is claim your feed.
Type your RSS feed URL here and Burn the Feed.
Since you’re on WordPress platform, you’re feed URL will most likely be:
http://www.yourdomainname.com/feed/
Just make sure to add /feed/ at the end of the URL.
Hit “Next”.
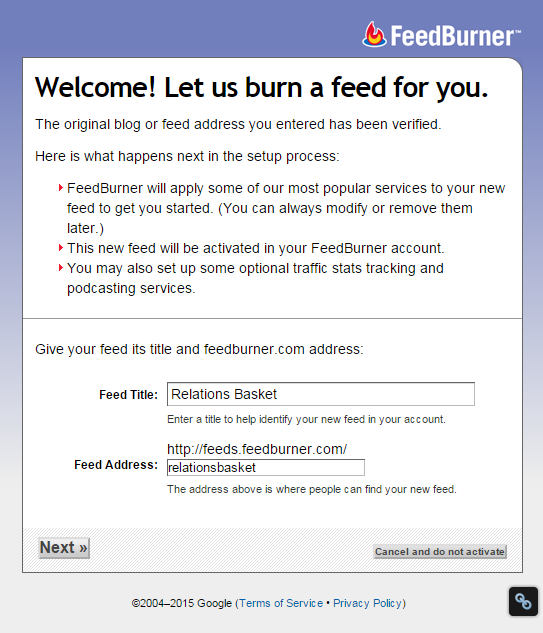
Give a Title and Address
Three things to remember here:
1. Give a short and sweet title. Avoid long titles as it looks funky with some RSS readers.
2. Keep the Feed Address all in lower cases because for some strange reason, some readers can’t interpret caps.
3. Keep the Feed Address short, preferably to the domain name, so that it’s memorable.
So, here’s how I made the Title and Address of my RSS. I have kept it to the domain name and all in small letters.
All done till here?
Hit “Next”.
Get the Stats
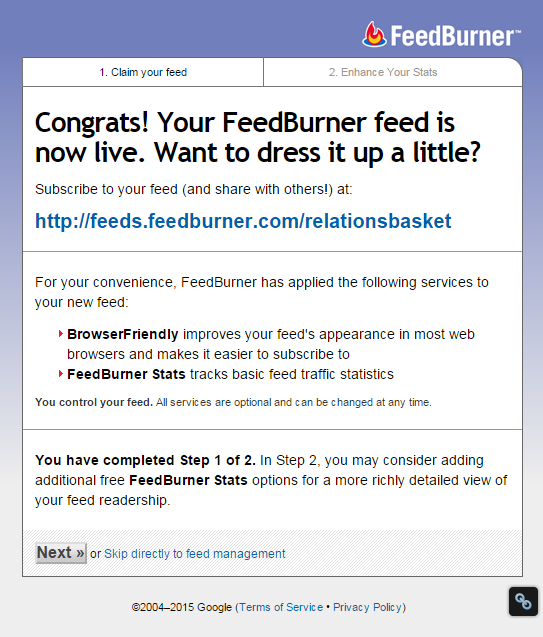
The next screen you’ll see after the above steps is where your Feed goes live.
“Congrats! Your Feedburner feed is now live”.
At this step, your Feedburner is ready.
You can either hit “Next” to get some more stats or “Skip Directly to Feed Management” if you want.
I recommend hitting the “Next” button.
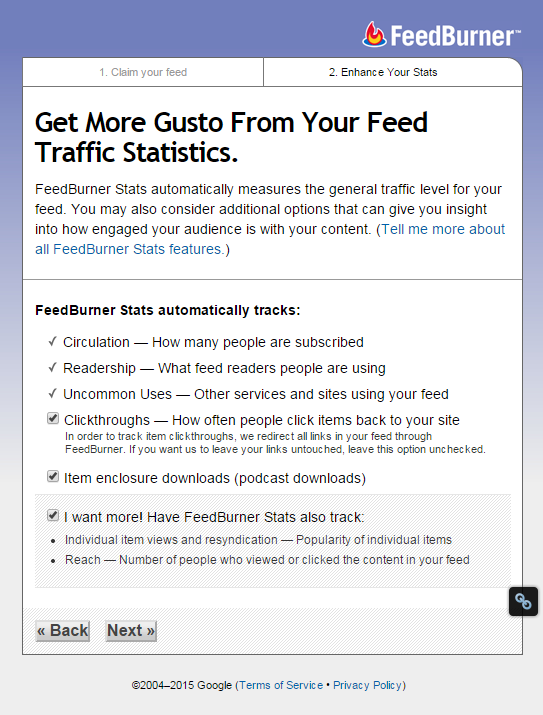
Just check on the 3 options ClickThroughs, Item Enclosures and the More Feedburner Stats. Doing this, you can track the clickthroughs to your site, track how many people are downloading your podcasts (even if you don’t have one right now, you might be having in the future, so enabling it is just fine).
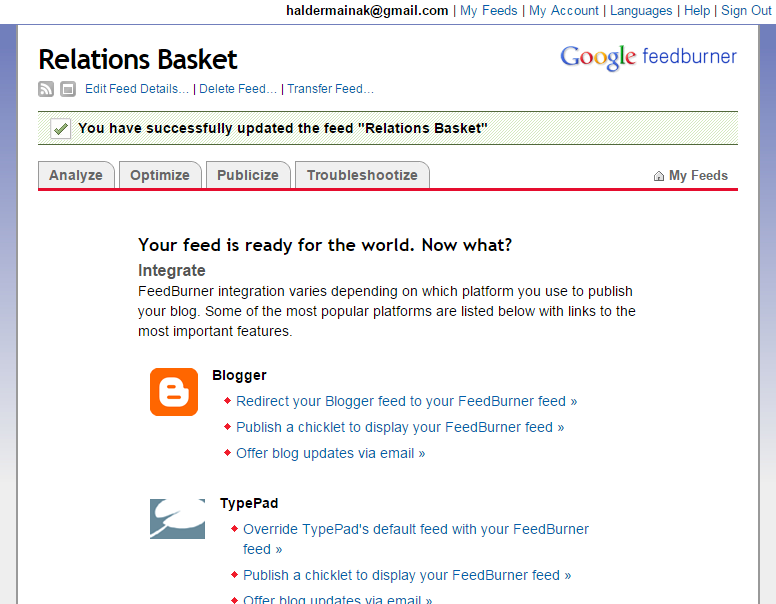
Click “Next” and you’re taken to the dashboard.
Here begins the real work of optimizing your Feedburner settings.
Optimizing Your Feed in Feedburner
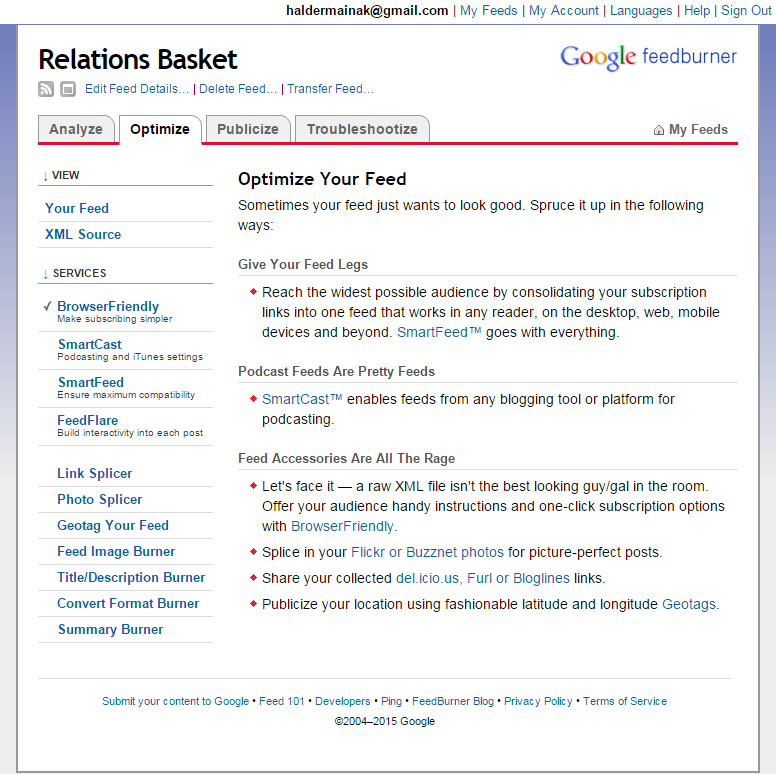
In the first part, I’ll walk you through the settings on how to optimize your feed in Feedburner settings through the Optimize tab.
Browser Friendly
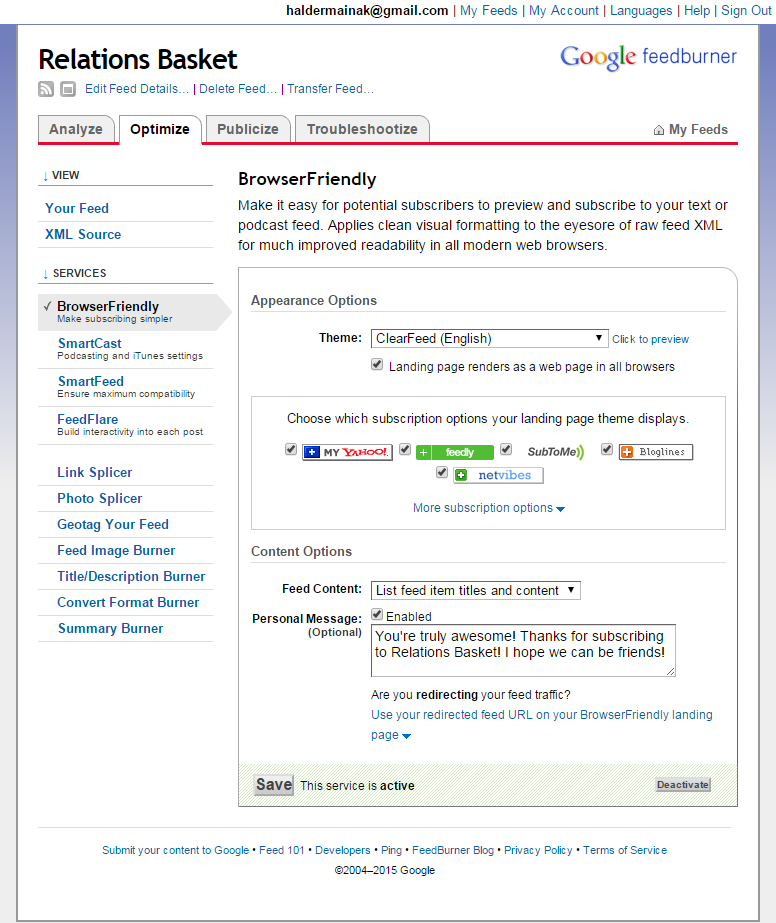
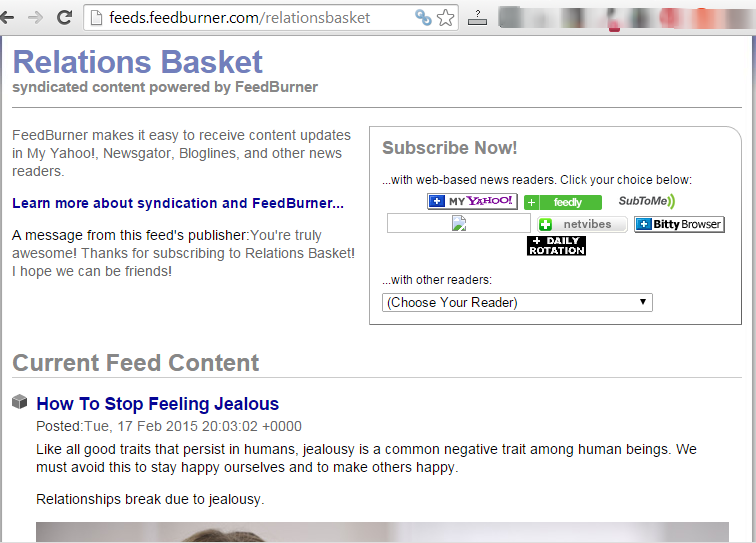
Activate the Browser friendly option and follow the settings I’ve done here.
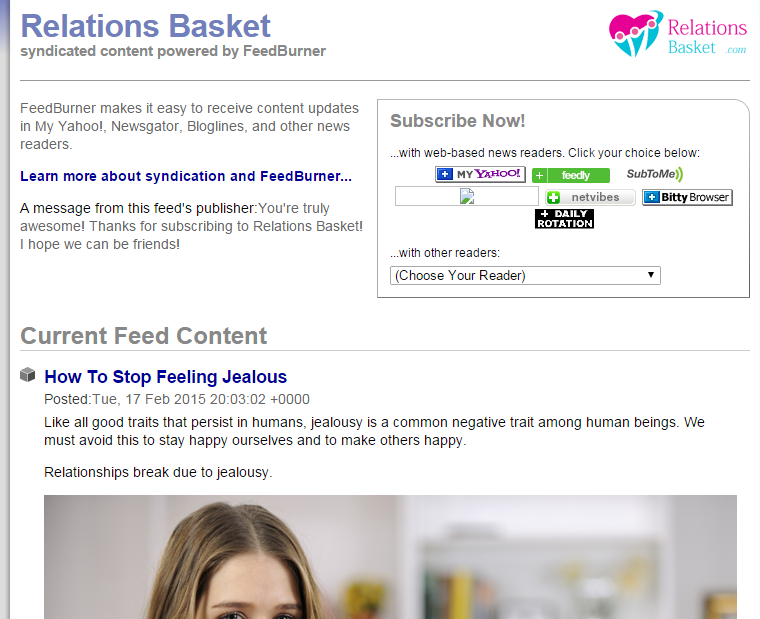
Select Feed Cntent to “Use Feed Item Title and Content” and enable the Personal message. This is optional but I recommend to add a unique personal message here. Give it a personal touch!
It eventually looks like this to your readers.
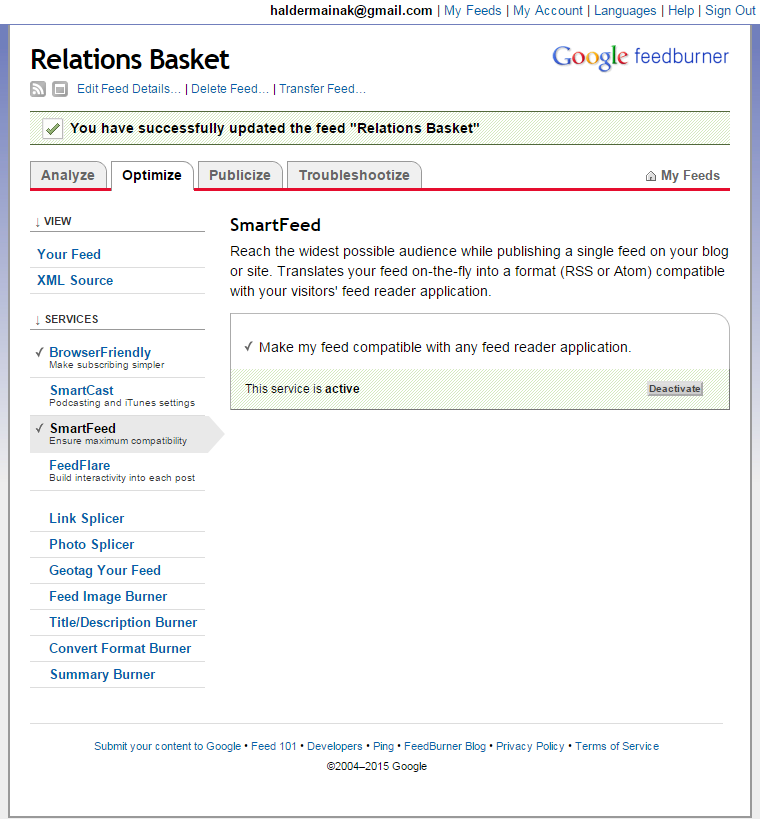
Enable Smart Feed
This section is pretty easy. All you’ve to do is activate the option.
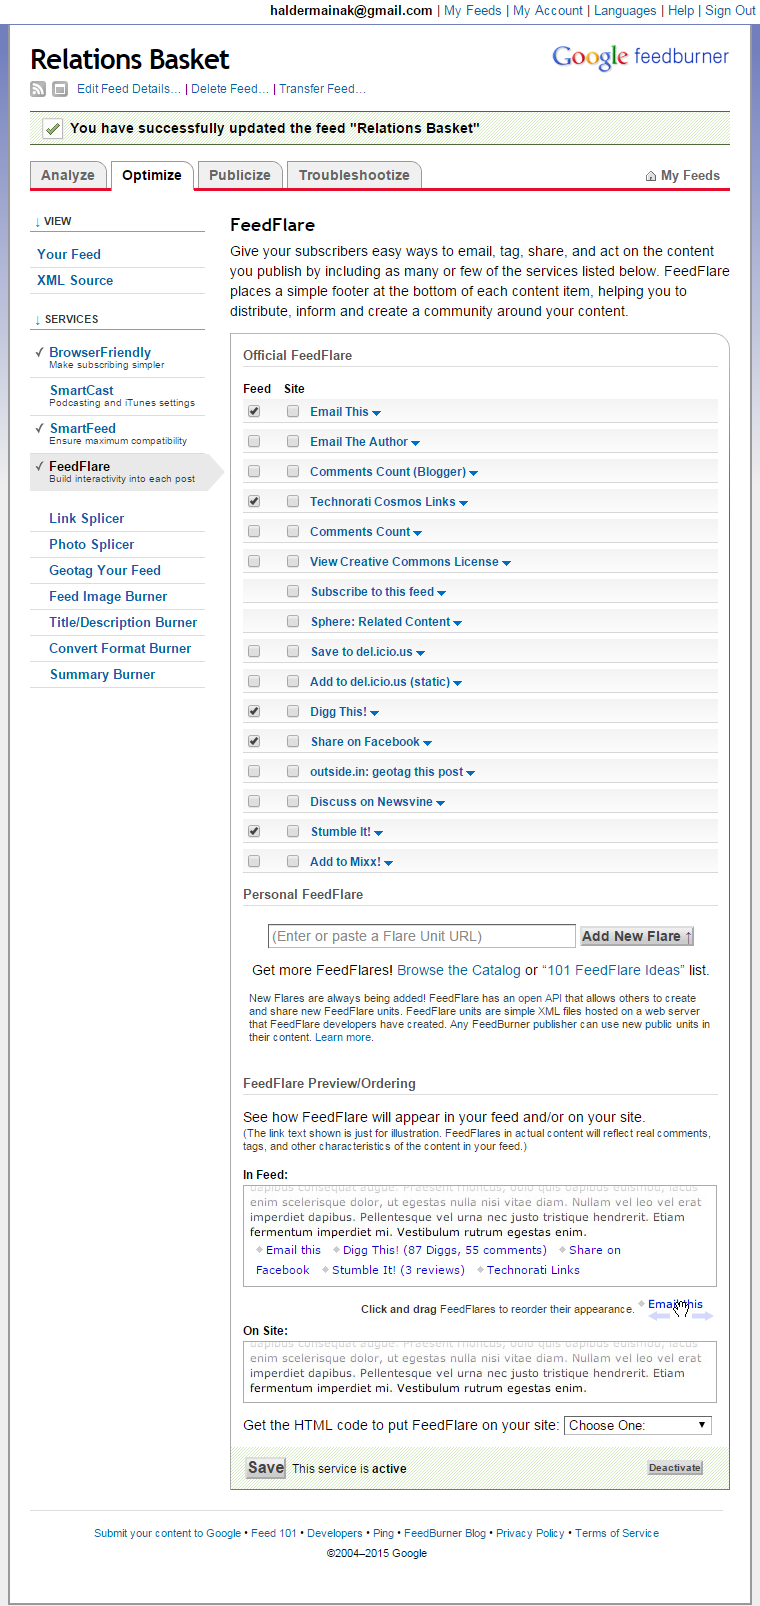
Feedflare
This section is pretty interesting. You’ll find some sharing options. I’ve got mixed results using them. For some niches, using few of these sharing buttons on RSS works very well while on other niches, I’ve got lesser shares.
Test and try on your RSS to see of it works for you.
I use only Facebook and StumbleUpon for PastMasterBlogger.
To the readers, it appears this way:
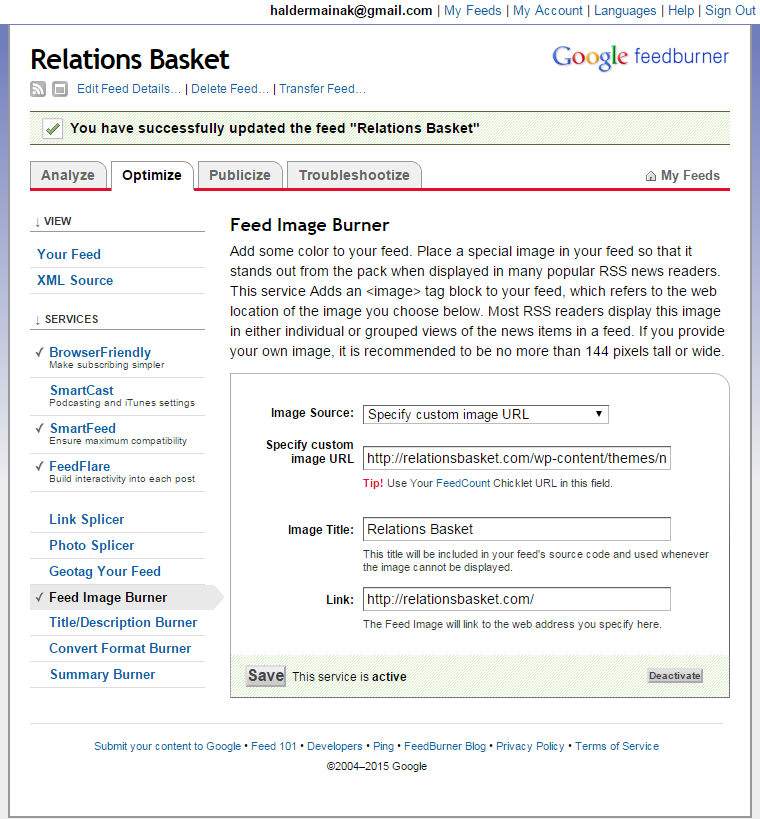
Feed Image Burner
I’m surprised at how many bloggers skip this section but putting up an image gives a branding and personality!
So, take a few seconds to add a custom image URL. Upload an image of max width and height of 144px and link it you’re your website.
Though it may not show up in some browsers like Safari, it does show in Chrome and Firefox.
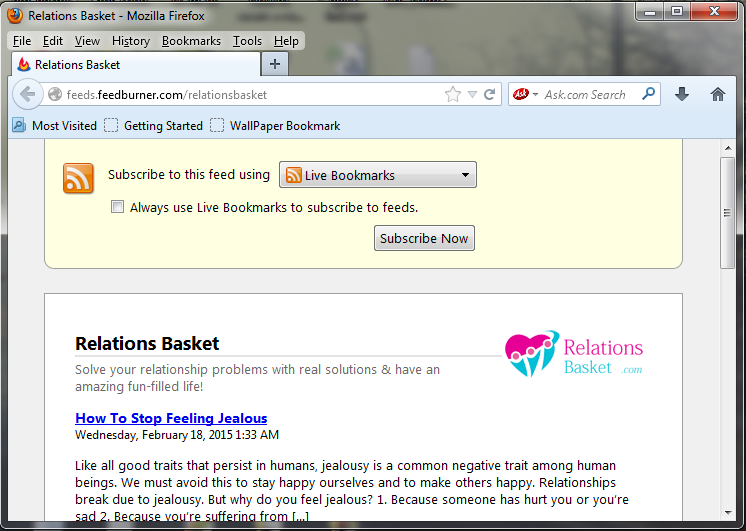
This is how it looks in Chrome:
This is how it looks in Firefox:
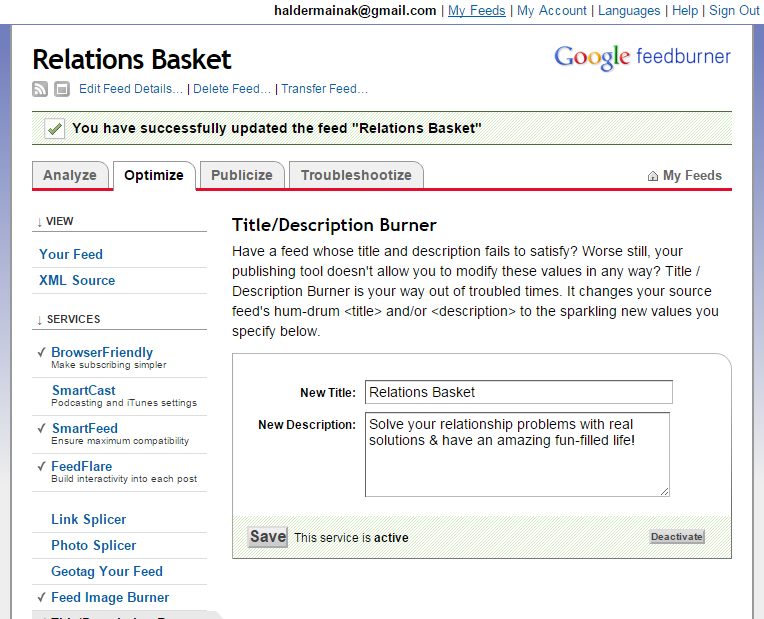
Title and Description Burner
Activate this section and give a unique title that goes with your niche along with a description stating exactly what readers will be getting in the RSS.
Pretty easy – right?
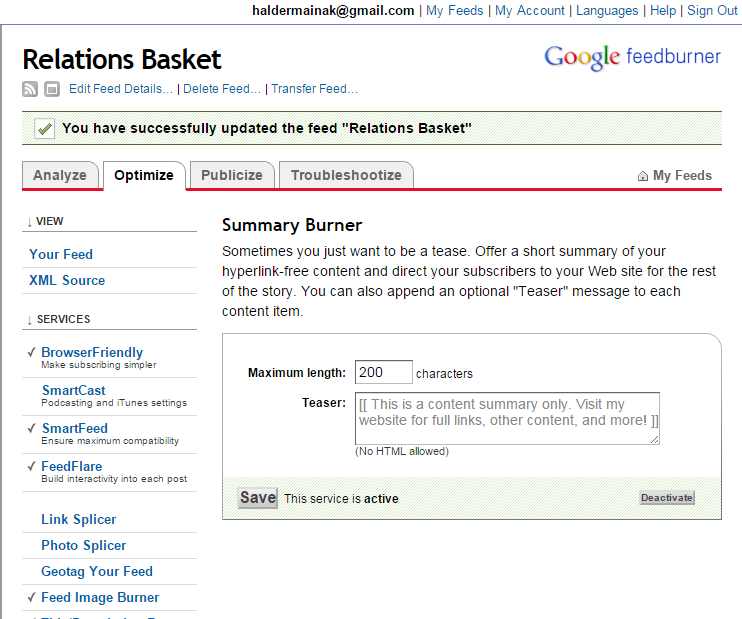
Summary Burner
Activate the Summary Burner.
Obviously, make sure you do so in your WordPress Dashboard > Settings > Reading section too. Set it to summary.
Many will say to not to activate Summary here but let the RSS readers read the content there itself. But I disagree.
You’ll lose many page views if you end up doing so. Also, there are chances of your articles getting copied away within minutes of publishing them.
So, I recommend activating Summary Burner.
With this, we come to the end of configuring the Optimize tab in Feedburner.
Next, let’s move to configuring the Publicize tab in feedburner.
Publicize Feedburner
Email Subscription
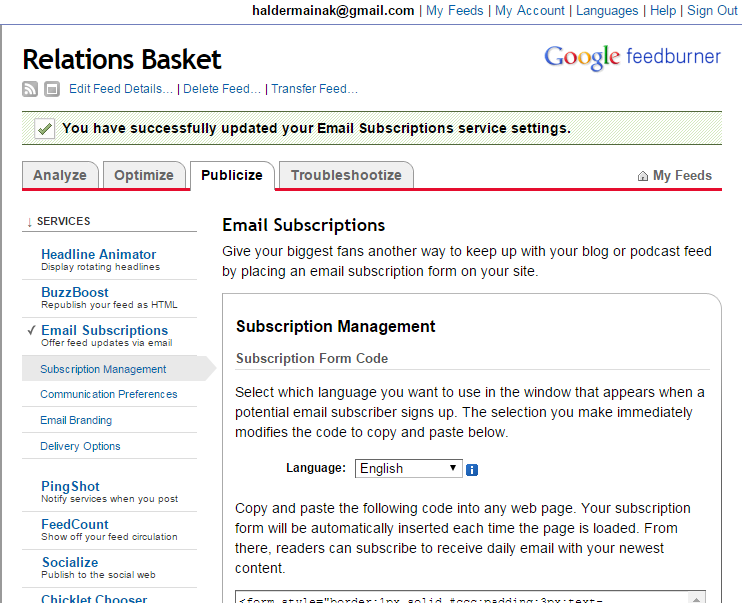
Do you want your readers to give them the ability to read your blog posts via email? Feedburner is the option.
Activate the service and you’ll get a code. Paste the code anywhere in the text widget in your WordPress blog to create a sign up form.
Note that email subscription and Email NewsLetter is not the same. Many confuse the two but both are very different.
Email Subsctiption subscribes your readers and they receive updates of your blog posts to their inbox daily.
Email newsletter is a periodic newsletter that subscribes readers to your blog posts or any other things other than blog posts.
Clear?
Okay.
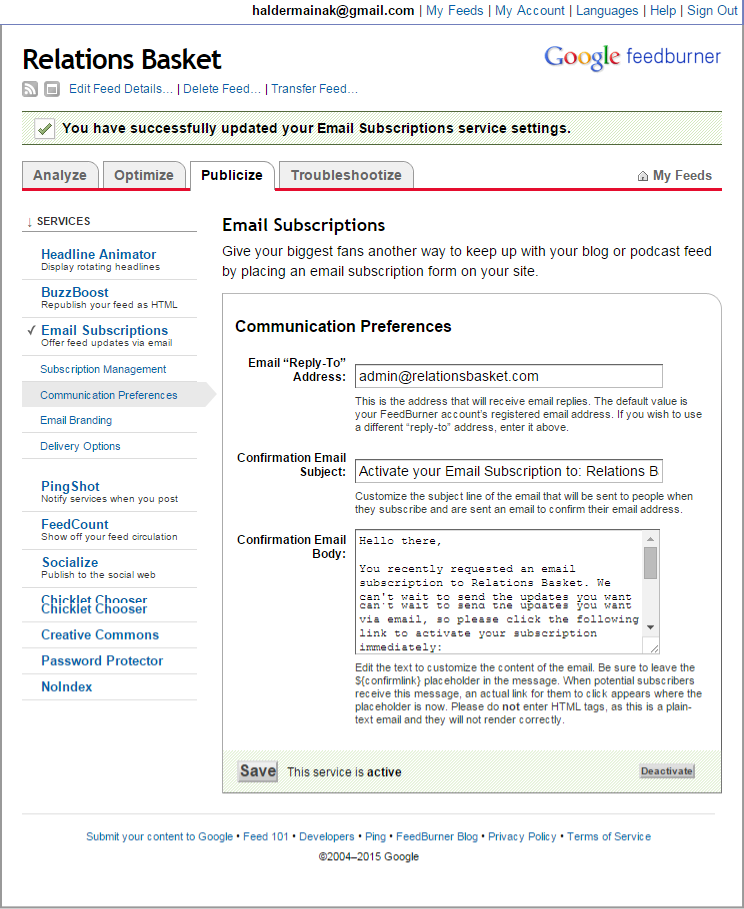
Under Email Subscription > Communication, give an email address you want your readers to receive their blog posts from.
For confirmation email body, give a personal touch by adding something to your readers. By default, you can see a message but this is what I use for my readers:
Hi there!
Wow! Great to have you subscribed to my blog, PastMasterBlogger.
You’ll be the first to receive my blog posts to your inbox directly.
All you have to di is confirm the link below:
${confirmlink}
If the link above doesn’t appear clickable, copy and paste it directly to your browser.
You can unsubscribe anytime you wish to.
Any issues or concerns, contact me directly here: mainak@pastmasterblogger.com
Email Branding
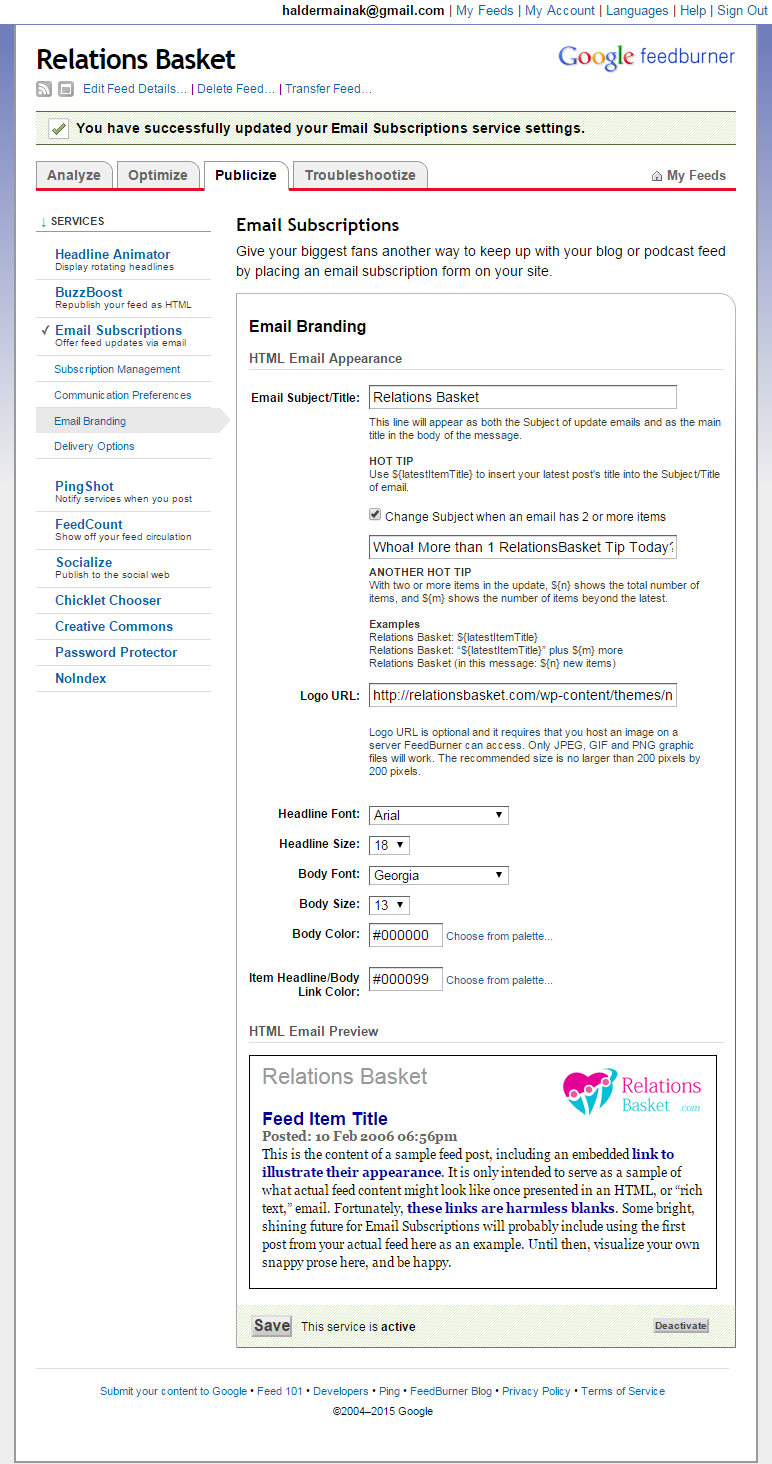
You have the opportunity to enhance your brand here by adding a logo . Upload your logo somewhere and put the URL path to LOGO URL field.
If you want your email subscribers to receive the title of your blog posts as the subject (that’s what I prefer), put ${latestItemTitle} in the Email Subject field. Otherwise, you can put something custom as well if you want to.
Deliver options
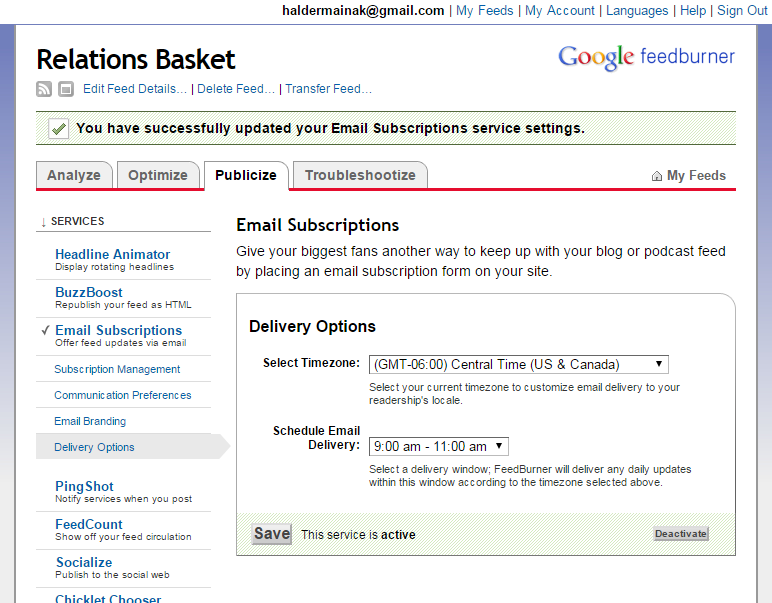
Pick the timezone and the time your readers are most active to opening emails and set the time accordingly.
You can get an estimate of this by checking your Google Analytics. Check from which country you’re receiving max visitors and set the time zone accordingly.
Pingshot
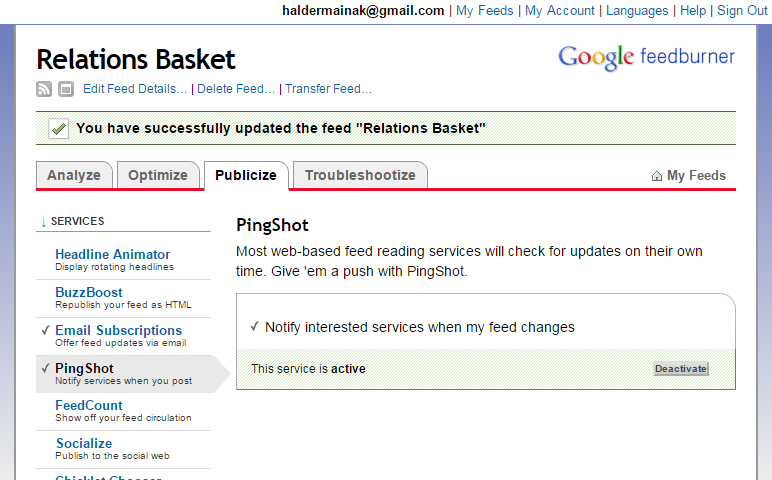
It very simple. Just activate the option. This makes sure that you’re reaching as broad audience as possible.
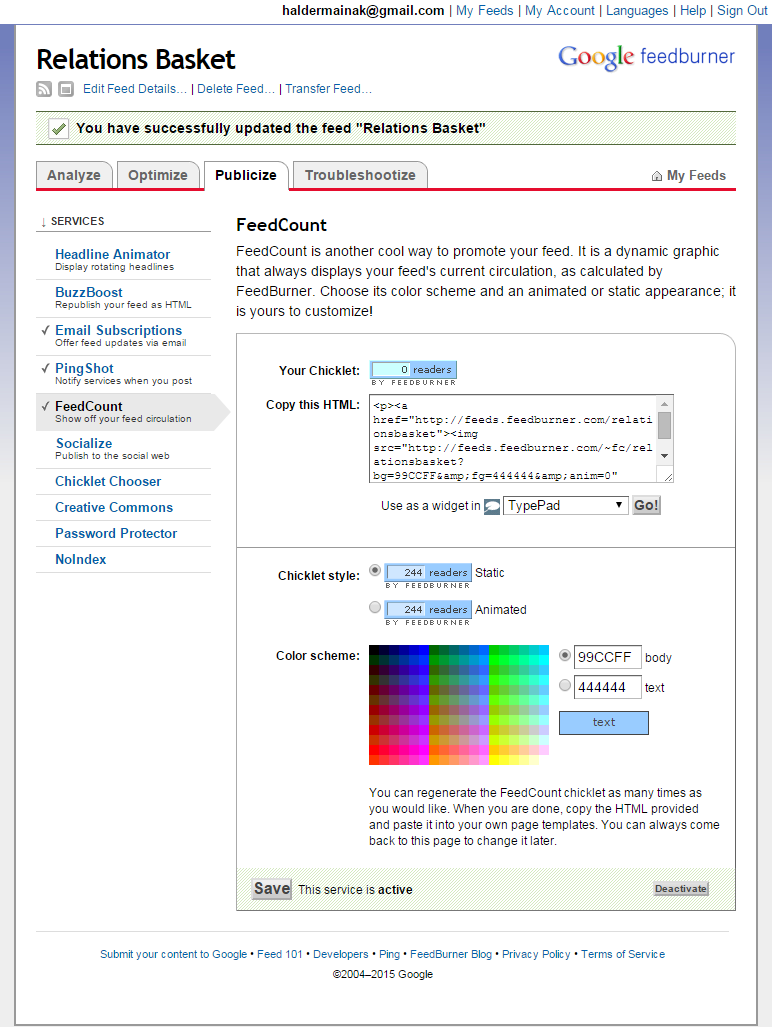
FeedCount
This system allows you to display how many subscribers you have on your blog and I think it’s a good thing to sshare.
Why?
By sharing these stats, you give an authenticity to your blog and its community. Even if its zero, there no shame, because everyone starts at that point.
By showing it at a low point, you’re always on high spirit to increase the count and therefore set on a short-term or long-term goal.
So, I’d recommend activating it and just put your feedburner ID (like mine is pastmasterblogger) to the theme RSS widget you already have.
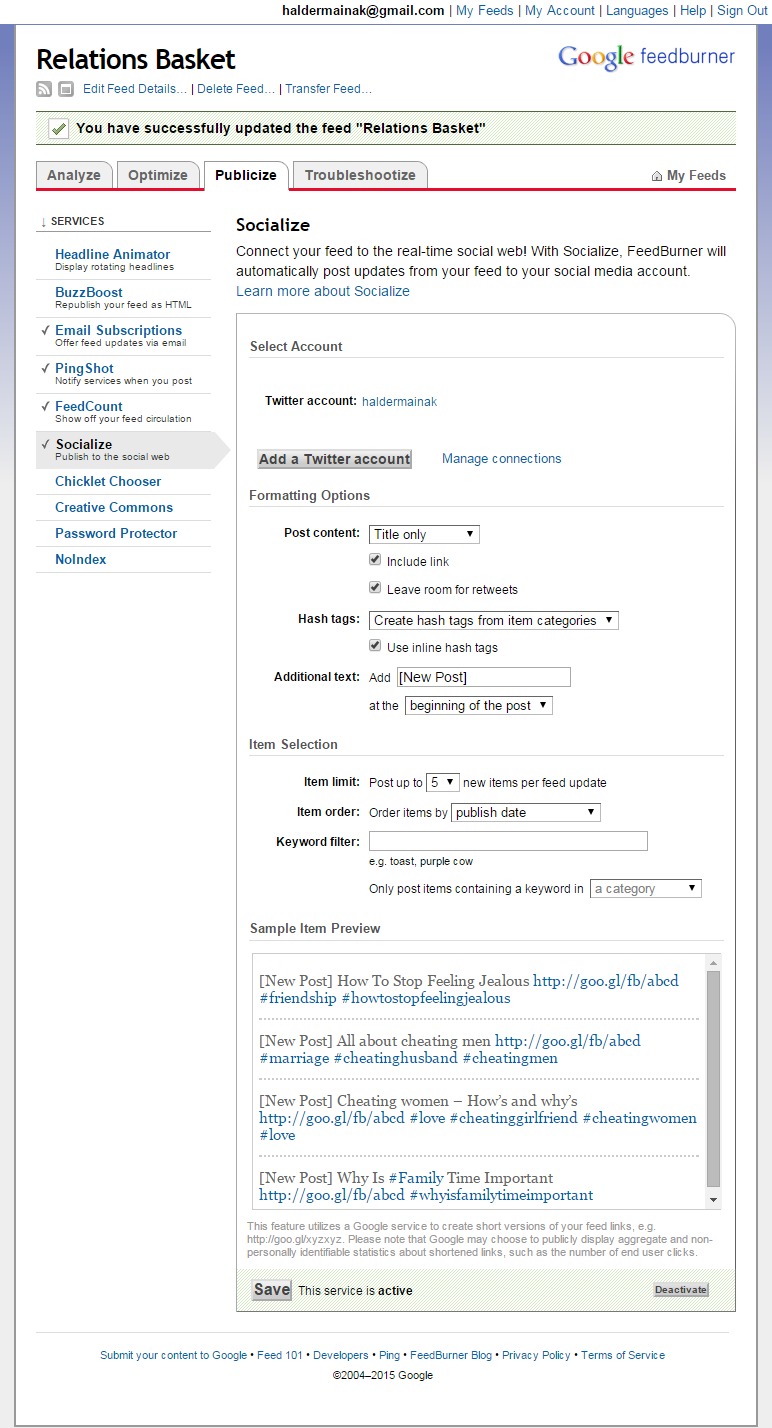
Socialize
Many people use this feature to automatically Tweet out their blog posts immediately they are published.
But I don’t prefer to.
Why?
Because I don’t consider myself a perfect writer, so there still may be some spelling errors here and there. So, I take to time to correct those issues, proofread it again and then finally Tweet out manually.
I aso use hashtags when tweeting out, which I am not able to set it custom, if I use this system.
Finally, it uses the Google shortener for shorting URLs and I’d prefer using Bit.ly which gives me a bit more control.
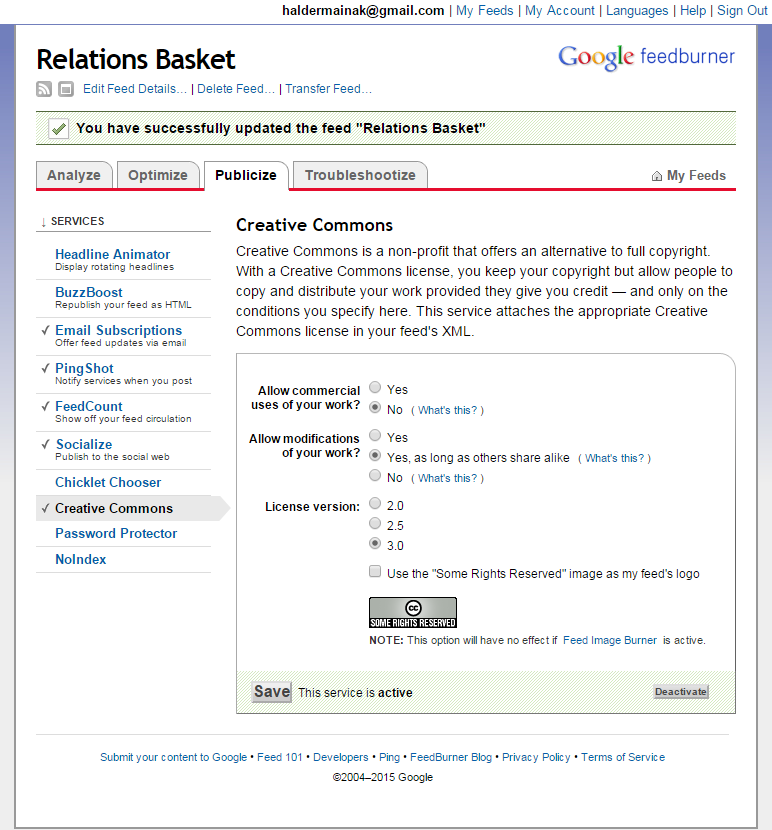
Creative Commons
Using Creative Commons License protects your work from getting copied. You can see the settings I’m using in the screenshot above and I think this to be the right one because I want people to use parts of my work as long as they give me credit back.
I don’t enable the badge because Feed Image Burner is already activated.
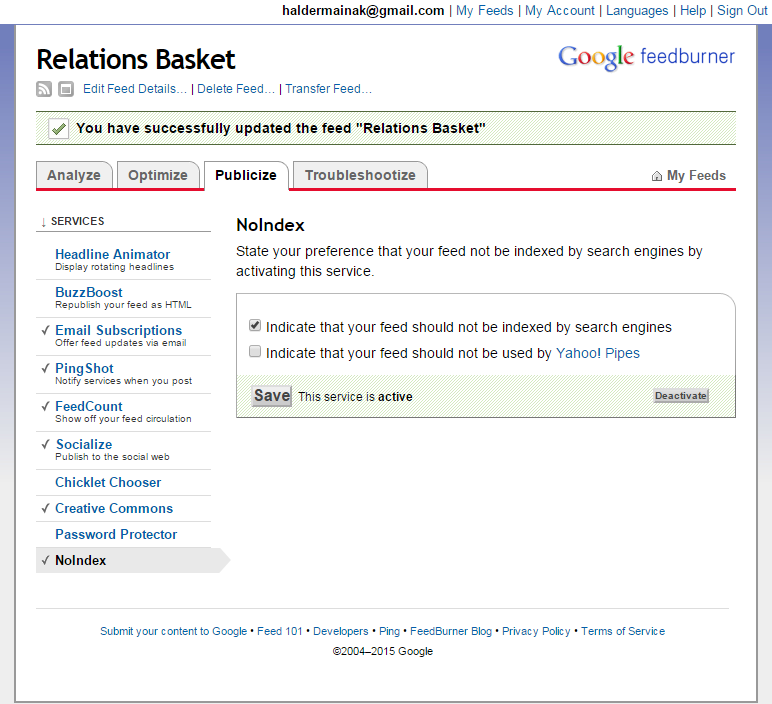
No Index Settings
Don’t let search engines index your feed because Google and Feedburner have really high PR, so indexing your feeds will make your feeds rank. This is sad as the content on your blog won’t rank while your feeds will start ranking.
Whew!
With this, we come to the end of the settings of Feedburner.
I would like to know via the comments below if you set up Feedburner in some other way.

“Here’s How to Set Up Feedburner the Right Way” is a must read. Using Feedburner is useful to improve your blog.
FeedBurner is a free service that is loaded with options that you do not get with the default WordPress feed. It has also great features, and it is great and important to bloggers.
Social Proof and integrate Google Adsense to monetize your RSS feeds are some of it’s tempting features.
Good thing you gave us a step by step guide on how to configure, optimize and set up Feedburner properly and effectively.
Thanks for the effort you took to expand upon this post so thoroughly.
Good point Metz, there is the option to monetize RSS with Google AdSense.
Hey Mainak,
This is a well researched post. The step-by-step set-up of Feedburner using RSS Tracking system and configuration is very clear.
I learned a lot from the configuration and have finally discovered how to tackle the areas that are problematic to me.
I use Firefox and have seen the walk through succeed!
I left the above comment in kingged.com as well
Hi Sunday,
Great to hear that this article could solve some problematic area of yours. And I think everyone must have an RSS Tracking System implemented to their blog to track the growth of the blog in terms of readers.
Hi Mainak,
Indeed a great post, Well this is my first visit on your page and i found something valuable to read. Well you have shared with us a quality guide of feedburner. and its configuration. Thanks for nice sharing 🙂
Glad to know that you liked the guide.
Indeed a perfect guide to setup feedburner. In recent past I have noticed that most bloggers are ignoring feedburner. They don’t have an RSS feed for their blog and this is a major drawback. You really put it very simple to configure feedburner.
Glad to know that you found the post useful Tauseef! RSS is moving behind but I think it still holds importance.
Hi
I have problem when i activate feed flare and select some option and then click activate.
showing error You must select at least one FeedFlare to activate the service
Can you show a screenshot of the problem?