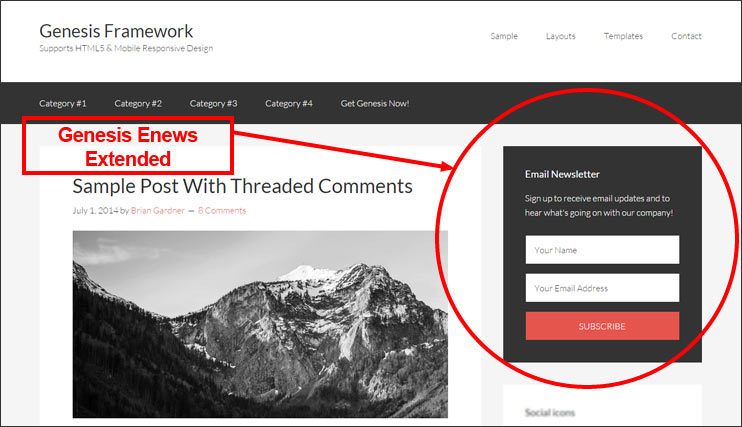
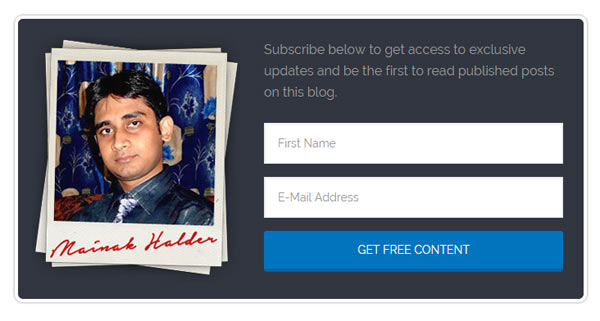
Do you like the opt-in form I’ve placed at the end of my posts, in the sidebar and in the footer offering something exclusive to my readers? If yes, then this article is for you – I’ll show you how to create these opt-in forms at different places of your blog or should I say customize Genesis ENews Extended.
 In fact, this article was a request from one of my blogging friends June who loved the design of my opt-in forms and wanted to know how I did it.
Note: This tutorial will work only on Genesis theme because I’ve tested it myself (I’m using a StudioPress theme, so it’s personally tested by me) and I’m not sure if they’ll work on any other theme.
If you’re on a Genesis theme and wanting to place an opt-in form for your readers to sign up, this tutorial will help you create those boxes.
Step-By-Step Guide to Customize Genesis eNews Extended and Create a Beautiful Optin Form
First, download and install the Genesis ENews Extended Plugin.
Now, go to Appearance > Widgets > drag the Genesis – ENews Extended Widget and place it to the section you want. For example, I’ve placed mine in the After-Entry section. However, you can place it in the Primary Sidebar or the Footer.
Next, type the text you want to show above the form. For example, you may write something like, “Enter your Name and Email below to Get Exclusive Updates”.
In the Form Action field, enter the form action provided by Feedburner/Aweber/Mailchimp/Getresponse – <form action=”COPY JUST THIS PART”>.
In the Email Field and First Name field, enter “email” and “name” respectively.
For the Hidden fields, enter <input name=”FEEDID” type=”hidden” value=”UNIQUE VALUE” /> <input name=”PUBLISHER” type=”hidden” value=”UNIQUE VALUE” />. You can find this in the HTML code provided by your email-marketing provider.
Now, click Save.
If you visit the site now, you can see an opt-in form.
Now, if you want to customize the form like mine, open style.css and place the code below.
If you’ve placed the Genesis ENews Widget in the After-Entry section, add the following to your stylesheet.
If you’ve placed the Genesis eNews Extended Widget in the sidebar or the Footer, enter this code in your stylesheet.
Please note that you’ve to create and upload a png image in the images folder you want to run in the background.
The Output For After-Entry
 So, did you find creating the subscription box easy enough? Should you have any doubts or confusions, ask in the comments below.

Hi Mainak,
Thanks for mentioning me. This is a great tutorial and I’ve been waiting patiently for it. But there’s a problem. I use Elegant Themes so I won’t be able to put your lessons into practice. I should have told you about the theme I use.
However, I’m sure this tutorial will help lots of other bloggers who are using Genesis. It’s clear and easy to understand.
I really appreciate you writing it in response to my request. That’s kind of you.
I hope you have a fantastic weekend. 🙂
June
You’re welcome June and I was in fact happy to mention you and have you as my friend. And so sorry to know that you’re on Elegant themes and won’t be able to use the tutorial. Anyway, I hope you liked reading it and if any day, you switch to Genesis in the future, this tutorial might help you or someone you know.
Have a very nice weekend too. 🙂
hello, this is a great piece, I have been searching the internet on how to place an Image above the subscription form on Genesis but there is no information out there. I have tried your method but it is not working. What I need is something similar to what you have on your sidebar where there is an image above the email subscription form.
Can you help me with that please?
Thanks I will be checking back for updates
Just an Update:
The customized codes now work but places the image behind the texts and the forms, I have tried to change from background image from bottom to top but nothing happens.
Just upload the image to your “Image” folder or “Uploads” folder through FTP, then get the image link, say www[dot]domainname[dot]com/wp-content/themes/theme-name/images/image-name.png (where theme-name is the name of your child theme and image-name is the name of your image. Replace it with actual names).
Now go the Apperance > Widgets > Genesis ENews Widget. And write this code within the opening and closing tags:
img src=”image url” class=”aligncenter”
on the “Text to show Before Form” area.
I have the problem that my image appear between the text and the optin form. Not to the left.
Can you help me with that
Thanks
Hi,
Great Blog Post but I don’t see the code that I’m suppose to paste in the style.css file. It’s missing from the blog post can you please help with this if you have the time =)
Regards,
Bilal
The code to place in the stylesheet is already given in the post Bilal.
Hi
Thanks for the great tutorial.
Can you also show how to change the text color?
thank you for this! on my site I am not sure how to create padding or a gap between the enews extended widget and the comment entry section – http://www.melissaleithwood.com/beginners-guide-to-optimizing-twitter/
any ideas are greatly appreciated.
There is after-entry section in the genesis themes. You can create padding from there.
Hello Mainak, thank you for the tutorial. I now have my enews extended on my primary sidebar.May I ask a question?
Is there a way to include the enews extended widget in a widget box that already has text? Please see my welcome widget at katherines corner dot com I would like to have the subscription area included in the welcome widget.
thank you for the opportunity to learn from you.
Warmly, Katherine
Hi There, I am wondering if this will also work on a Education Theme that is built on Genesis?
Yes Adero, this code works on any Genesis theme, including Education.
Hi Mainak
I’m kind of trying to replicate Lead Pages but using Genesis eNews Extended on a page… Any suggestions… I want something to replicate what you’ve used for After Entry, i.e. something that goes across the page.
I’m using Digital Pro, which automatically uses the widget for signups on the home page… but is a tad more challenges to insert into a page.
Any thoughts would be most welcome.
Jane
Thanks for the tutorial. I’ve deployed enews using the Genesis Altitude Pro theme. In the style sheet there is no distinction I can find between sidebar and footer. It would appear as if the styling is inherited from the enews plug in. That’s my suspicion. What do you recommend?
The stylesheet of Genesis Altitude Pro theme is quite clear. It has the sidebar and footer written.